
FPGB : Can i have a new Gameboy Color please ?
Mis à jour :
The Game Boy is one of my favorite consoles. Not only is it one of my favorites, but it was also my first portable console! I remember how I used to drive my parents crazy when the batteries ran out. I spent countless hours on this console, from leveling up my Pidgey to level 100, to speed-running Bomberman Pocket with my cousins, and now nostalgia has hit me hard in my 30s! Given that the price of Game Boys has skyrocketed recently (we’re almost at €100 for a GBC on Le Bon Coin), I turned to my specialist friend @n0ciple (check him out, he does awesome projects), who told me about the FPGA Game Boy (fpGB). 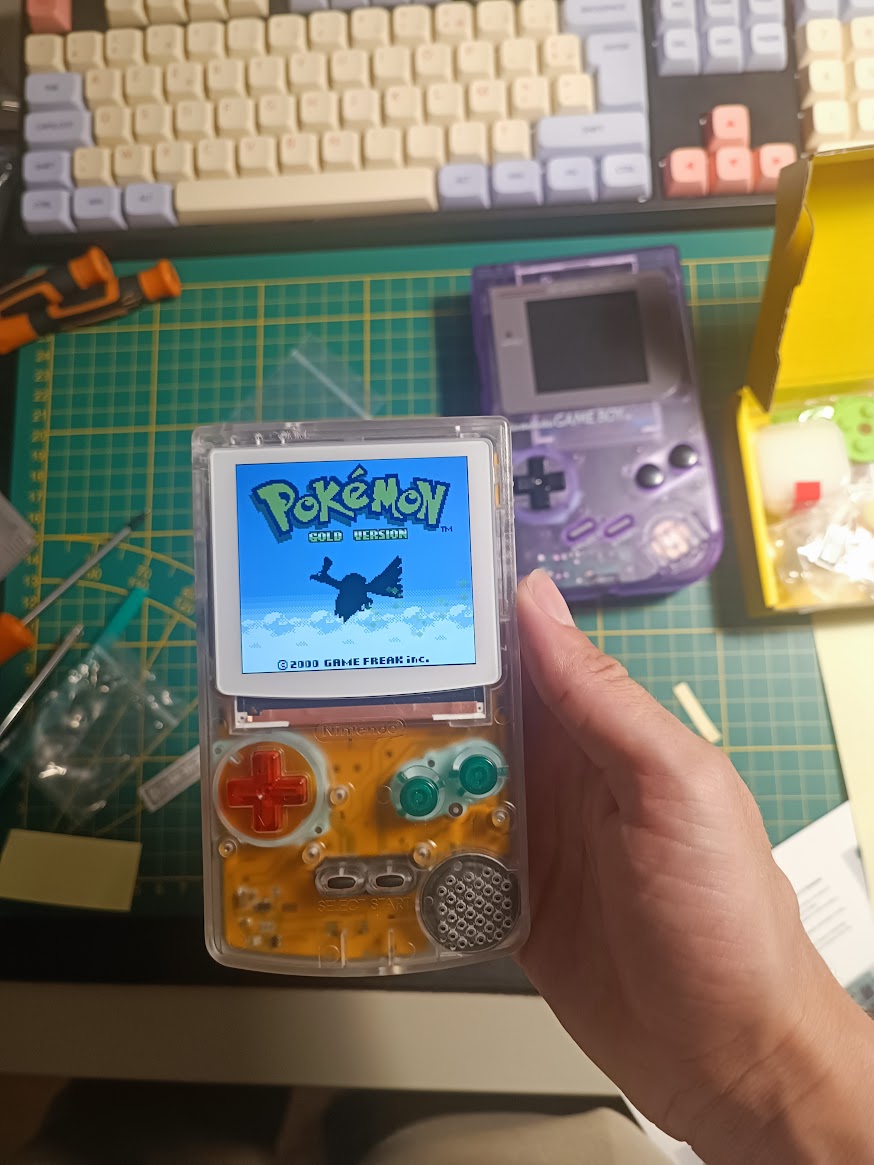
FPGB : what is it ?
FPGB is a kit that simulates real hardware using FPGA meaning that you can use your old cartridge.
A field-programmable gate array (FPGA) is a type of configurable integrated circuit that can be repeatedly programmed after manufacturing. FPGAs are a subset of logic devices referred to as programmable logic devices (PLDs). They consist of an array of programmable logic blocks with a connecting grid, that can be configured “in the field” to interconnect with other logic blocks to perform various digital functions.
The main idea is to simulate the original hardware of the Game Boy Color. By doing this, you avoid running another layer of abstraction, as is done with emulators, and return to the old-school experience. It’s like having your grandfather reincarnated in a teenager’s body!
How much does it cost?
The basic kit can be bought on Funnyplay for $70 (excluding shipping fees). If you want to personalize it a bit, you’ll need to add a few extra bucks! Personally, I fell in love with the yellow PCB and decided to go with it.
Is it easy to build?
Yes!
You don’t need to solder anything; you just need to be patient and careful ;)
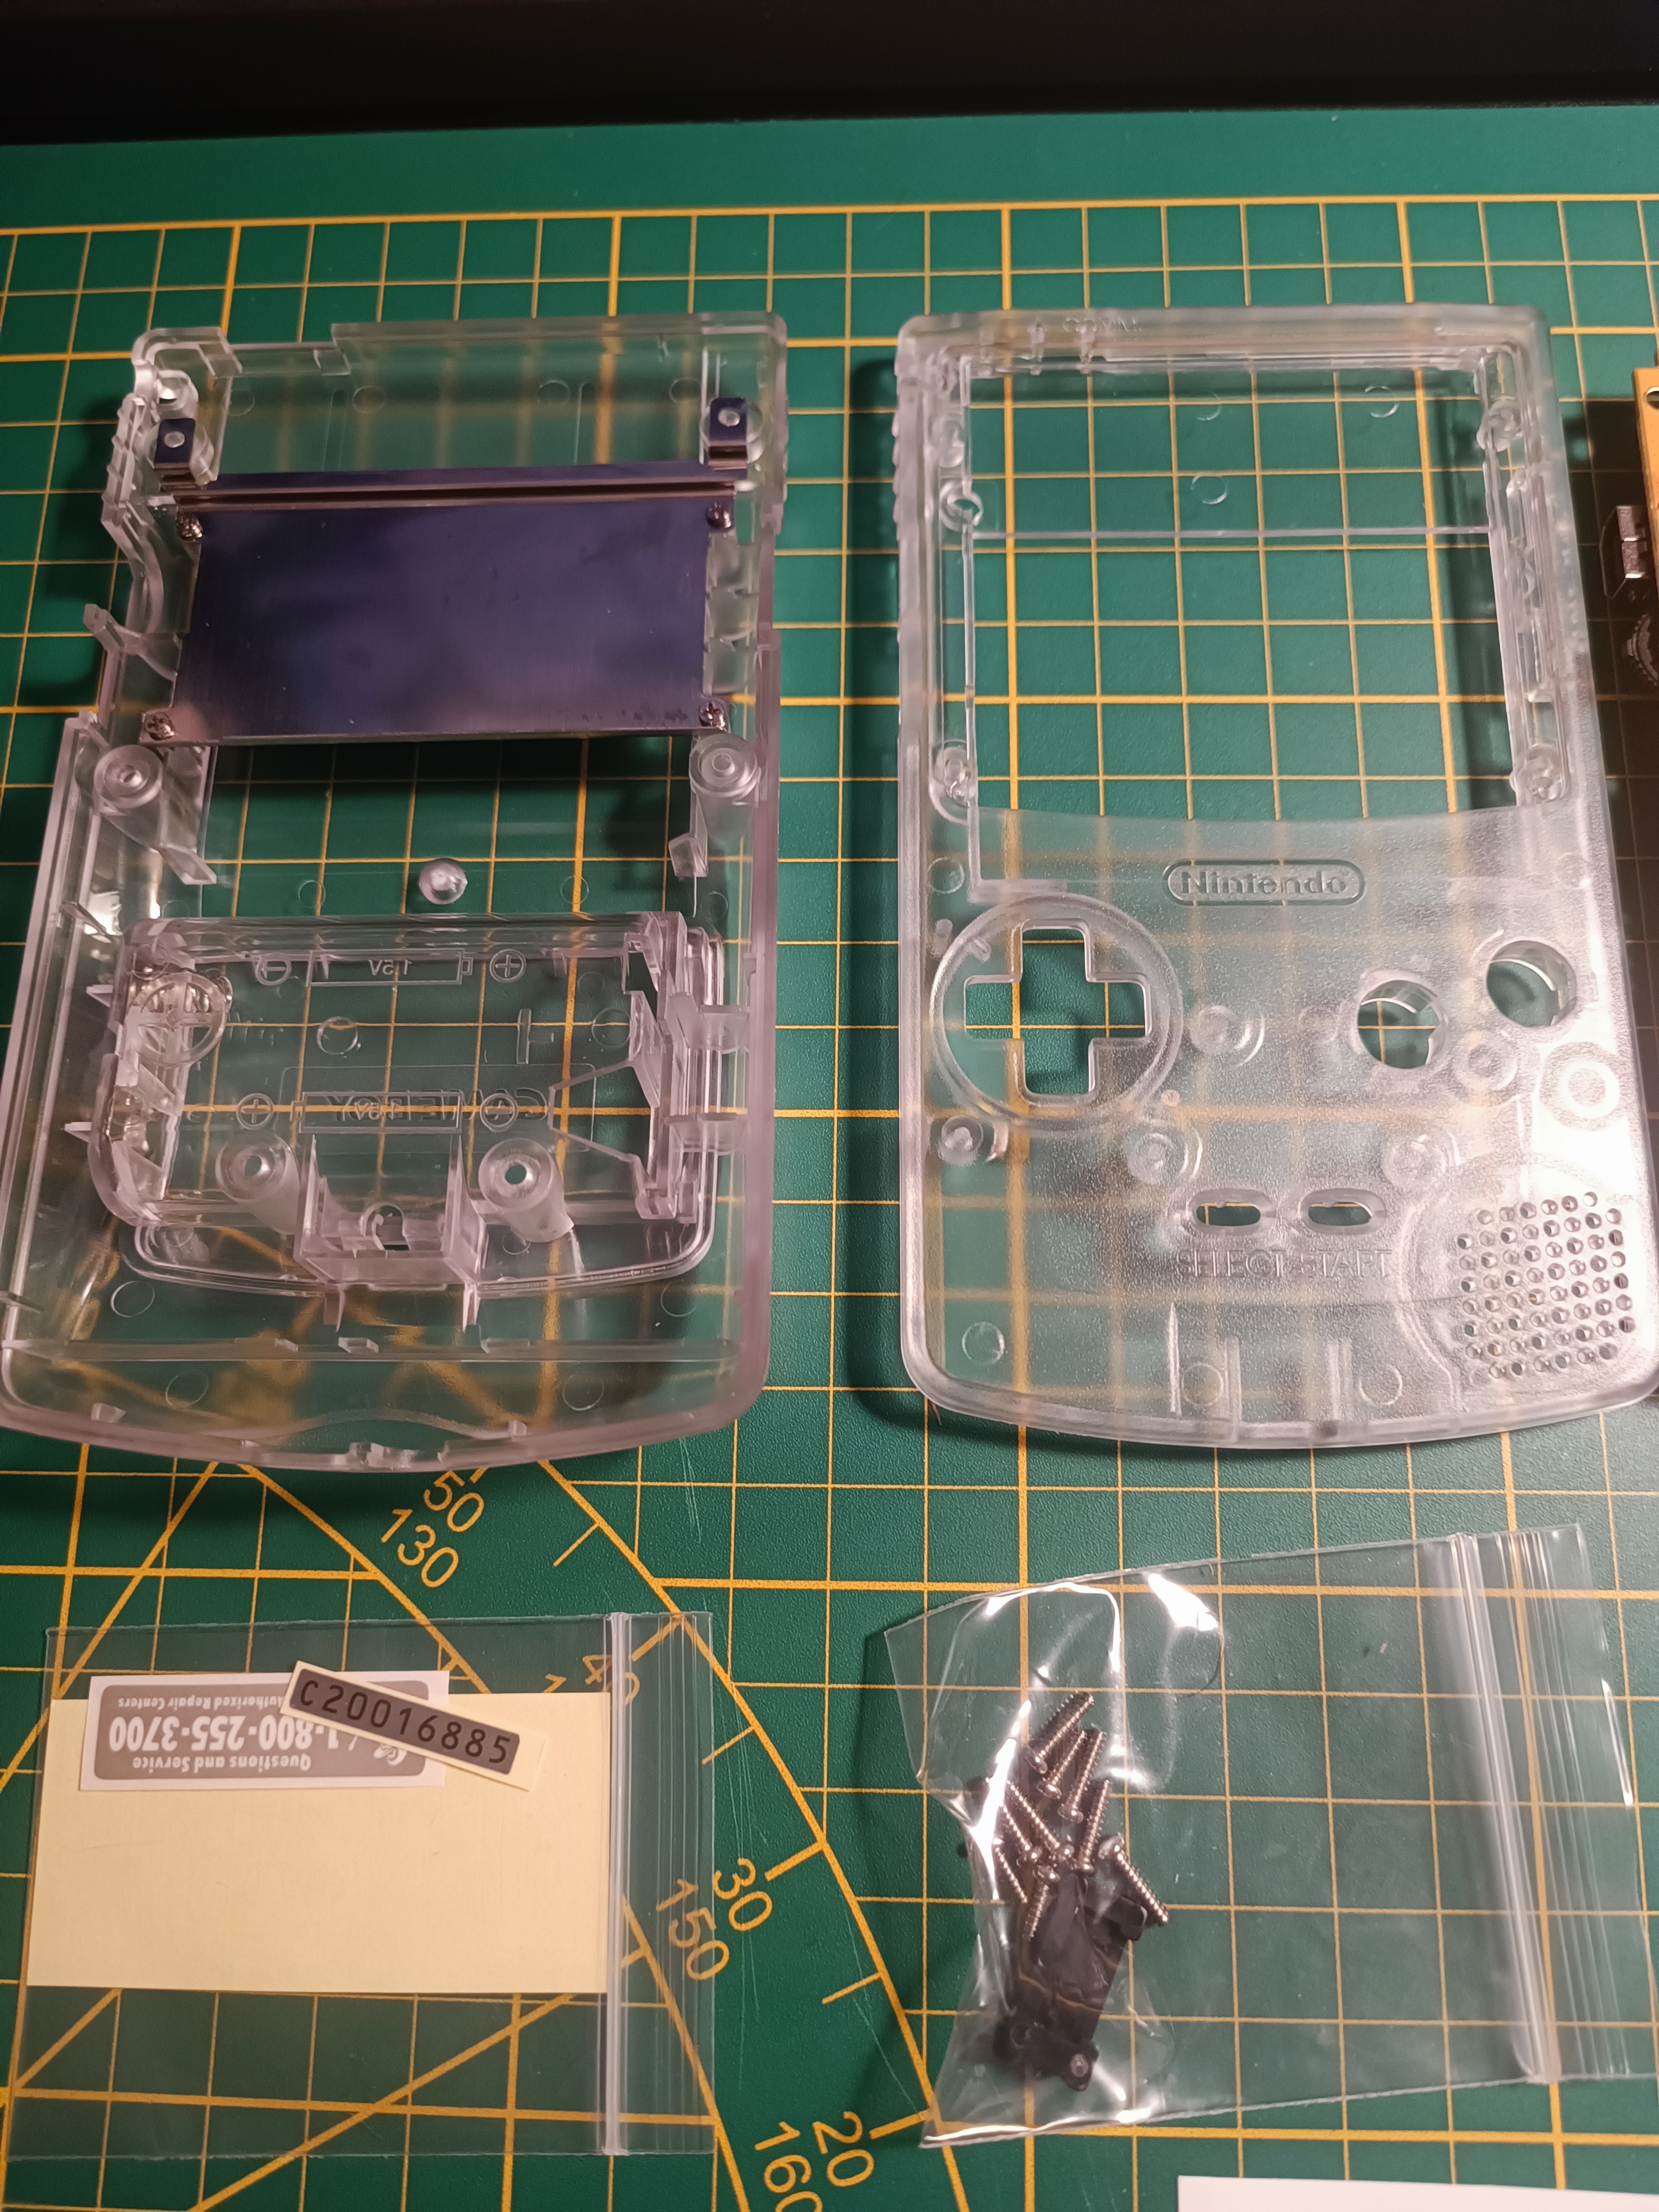
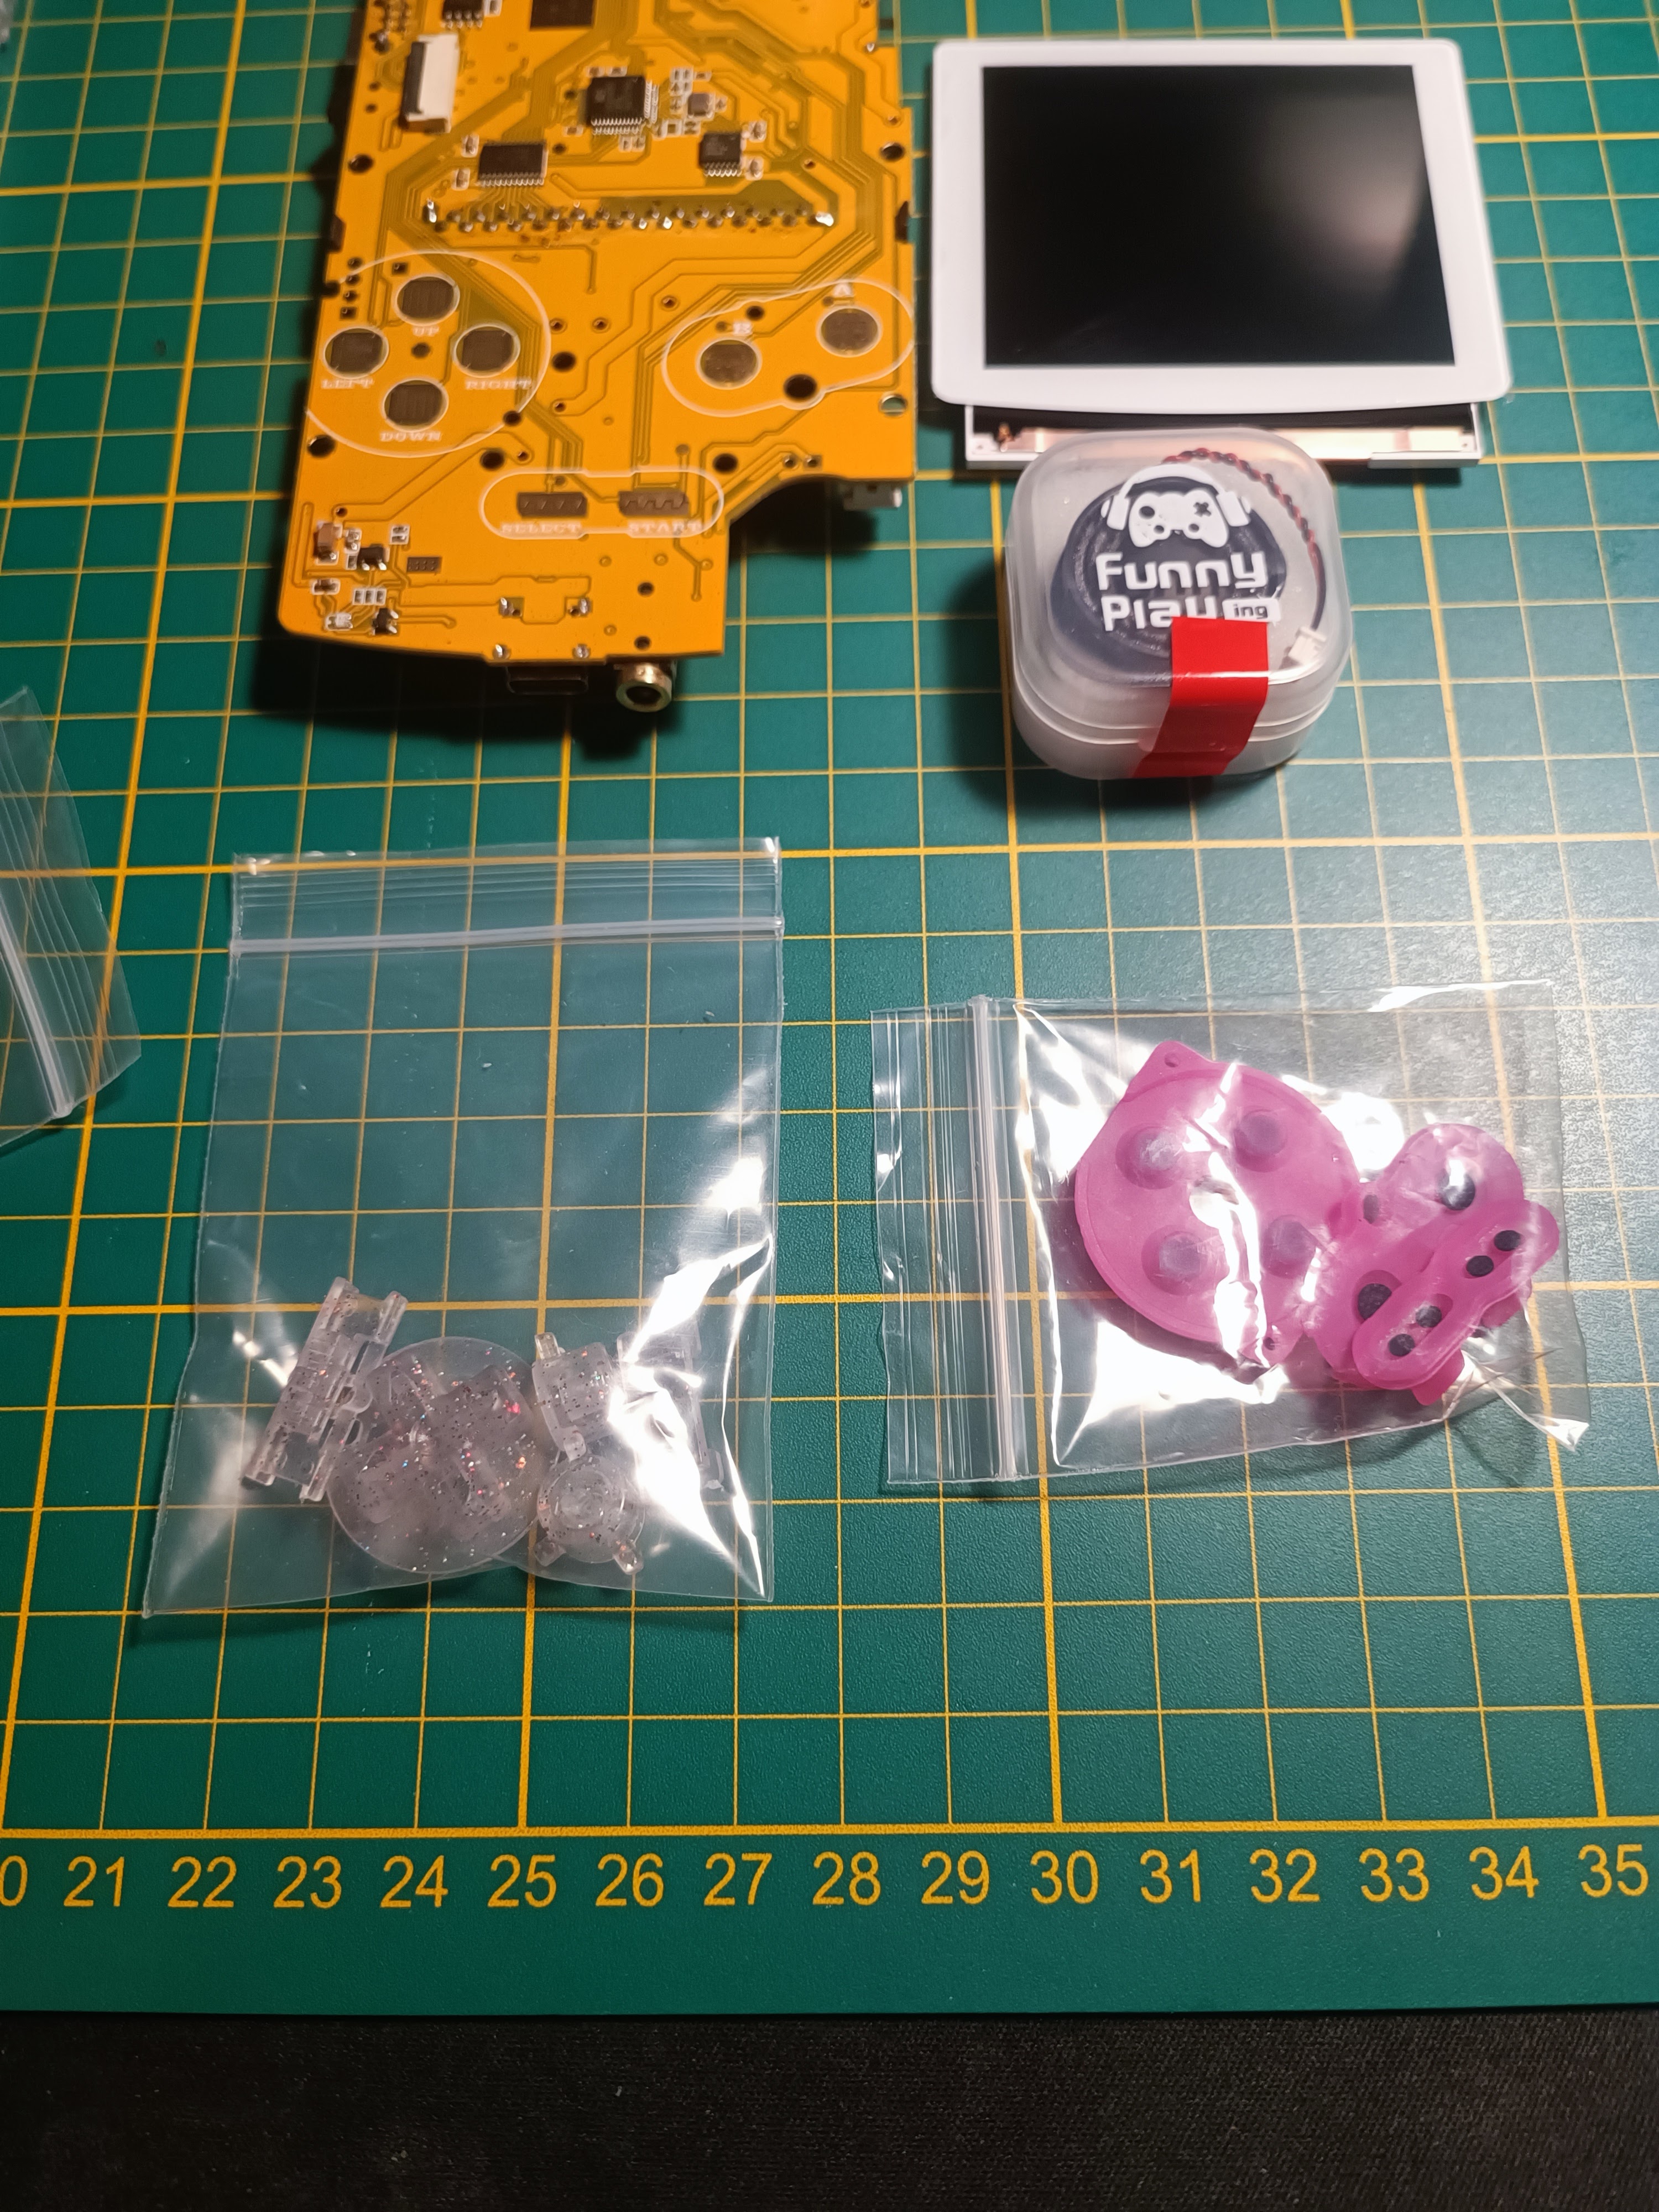
The kit comes with the main PCB, IPS screen, battery, and speaker. You will need to add the case and the silicone buttons (which is also the main area for personalization).
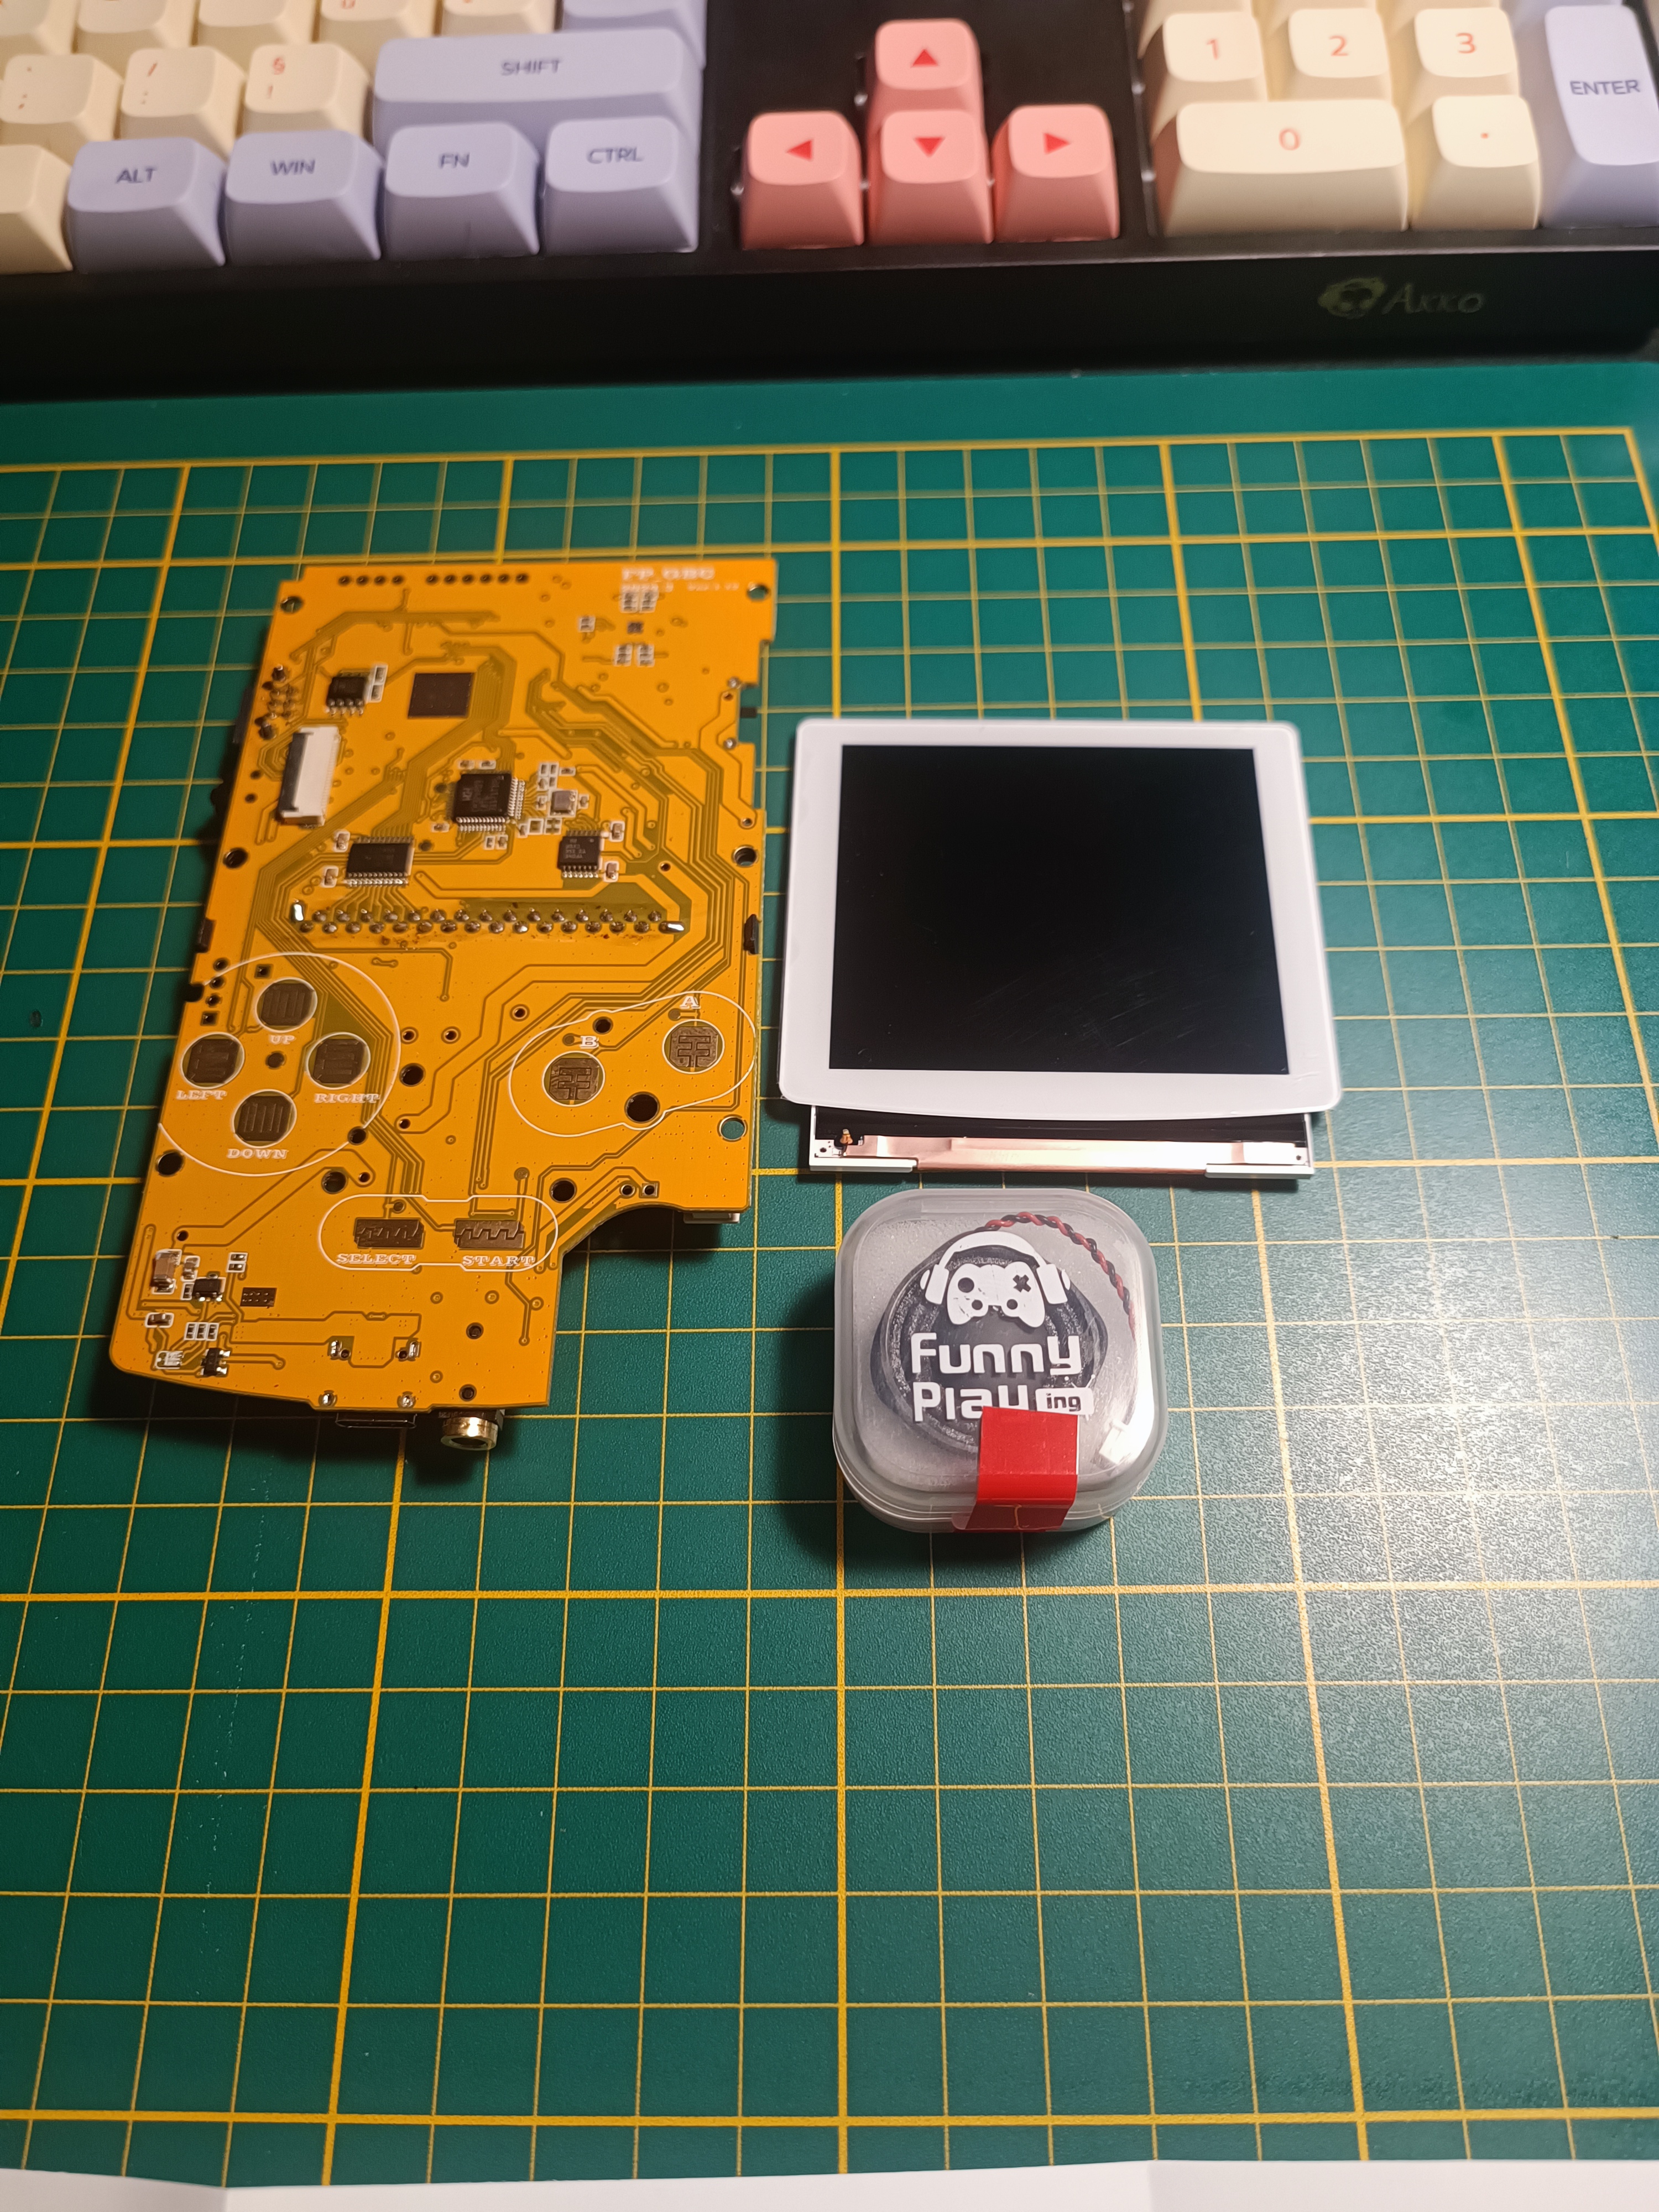
The hardest part is inserting the ribbon cable from the IPS screen into the main PCB. Be sure to lift the black clip before sliding in the ribbon, and make sure to close it properly afterward. You’ll also need a Nintendo (Y) screwdriver to assemble everything. If it’s your first time, expect it to take about an hour to do it right ;)
Am i happy with it ?
For sure! Now I can go die again in the Jade Forest, Level 3!
What next ?
This project has made me want to dive deeper into the world of ROMs and better understand how to either create a game using GB Studio (maybe a WarioWare-like?), or start with simple ROM hacking (like adding new levels to Mario Picross?).